Table of Contents
Ice Cream Sandwiches Recipe — Rich Fudge Brownie & Your Favorite Ice Cream
I still remember the first time I made these Ice Cream Sandwiches in my tiny NYC apartment kitchen. It was the middle of a sweltering July heatwave, and I was craving something that combined the deep, fudgy richness of a Parisian brownie with the icy, creamy relief of my favorite ice cream. This Ice Cream Sandwiches recipe is my love letter to summer—a brownie that’s intensely chocolatey but sturdy enough to hold up to a generous scoop of ice cream, creating the perfect handheld treat. Growing up in Morocco, my mother would make a simple semolina cookie to sandwich with fresh fruit preserves; this is my American, chef-trained twist on that childhood memory.
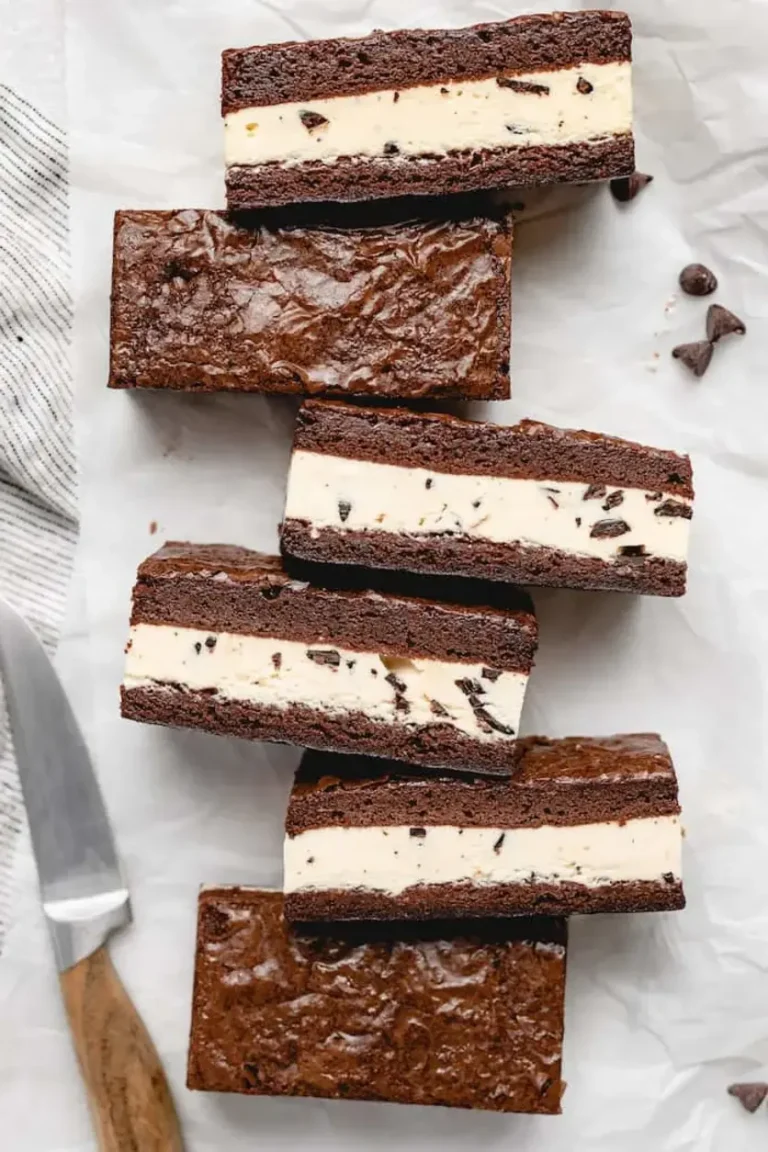
The magic of these Ice Cream Sandwiches lies in the contrast. Imagine biting into a brownie that has a delicate, crackled top—the hallmark of a perfectly made brownie—and a dense, fudgy interior that doesn’t crumble when frozen. Then you hit the cold, silky ice cream, and it all melts together in your mouth. The vanilla extract and cocoa create a deep, almost smoky chocolate flavor, while the butter and brown sugar add a touch of caramel. It’s a sensory experience: the snap of the brownie, the initial chill on your teeth, and then the creamy, luxurious melt.
What makes my version stand out is the technique. I’ve spent years perfecting this formula—first in French pastry school, where I learned the science of emulsification, and then in my own kitchen, testing until I got that perfect fudgy texture that works even after a deep freeze. The key is adding those eggs one at a time and mixing them well; this creates the glorious crackled top and ensures the brownie stays tender, not tough. Many people make the mistake of overbaking, which leads to a dry, crumbly sandwich that falls apart. I promise this recipe is foolproof if you follow my visual cues. I’ll walk you through every step, from picking the right ice cream to cutting perfect squares.
Why This Ice Cream Sandwiches Recipe Is the Best
The Flavor Secret. This isn’t just a brownie wrapper—it’s a carefully balanced chocolate vehicle. I use both cocoa powder and melted butter to create a deep, dark chocolate flavor with a chewy, fudgy texture. The brown sugar adds a subtle molasses note that pairs beautifully with vanilla or chocolate ice cream. My French training taught me to always bloom the cocoa for a few minutes with the hot butter mixture to intensify the flavor, a step I never skip.
Perfected Texture. The key is in the egg mixture. Beating the sugar and butter until fluffy, then adding eggs one at a time, creates an emulsion that traps air and gives the brownie its signature crackled crust. This also makes the brownie pliable enough to freeze without becoming rock-hard. I learned this technique while perfecting a classic French financier—the same science applies.
Foolproof & Fast. This recipe is designed for the home cook. You need two 8×8 pans, which you can get at any US grocery store, and about 20 minutes of active prep time. The long freezing time (minimum 6 hours, overnight is best) is hands-off and ensures you get clean, gorgeous slices. Even if you’ve never made ice cream sandwiches before, you’ll nail this one on the first try.
Ice Cream Sandwiches Ingredients
I picked up the butter and cream for this recipe at the Union Square Greenmarket last week, where the dairy is always the freshest. The cocoa powder I source online or from a specialty spice shop in Brooklyn—it’s worth the extra effort for that deep flavor. And the eggs? Always room temperature, a trick from my Paris days that ensures a perfect emulsion.
Ingredients List
- 1 1/2 cups unsalted butter (melted)
- 2 1/4 cups granulated sugar
- 1 1/2 cups light brown sugar (packed)
- 6 large eggs (room temperature)
- 3 tbsp vegetable oil
- 2 tbsp pure vanilla extract
- 2 1/4 cups all purpose flour
- 1 1/2 cups cocoa powder
- 1 1/2 tsps salt
- 1.5 qts your favorite ice cream flavor (you can use less if you prefer)
Ingredient Spotlight
Unsalted Butter. This is the fat that makes the brownie rich and fudgy. I always use unsalted so I can control the salt level. In a pinch, you can use salted butter, but reduce the added salt by 1/4 teaspoon. The flavor will be just slightly different.
Cocoa Powder. Use a good-quality unsweetened cocoa powder, like Dutch-processed for a darker, smoother flavor. Natural cocoa powder works too but will produce a lighter, more acidic brownie. I recommend Ghirardelli or Valrhona for the best results.
Ice Cream. This is your chance to get creative! Classic vanilla, chocolate, or cookies and cream are all fantastic. But I love using a salted caramel or even a Moroccan-inspired cardamom honey ice cream for a unique touch. Just make sure it’s a standard 1.5-quart tub; you’ll have extra, which is never a bad thing.
| Original Ingredient | Best Substitution | Flavor / Texture Impact |
|---|---|---|
| Unsalted Butter | Salted butter (reduce salt by 1/4 tsp) | Slightly saltier brownie, same texture. |
| Granulated Sugar | Coconut sugar (use 1:1) | Lighter, less crisp top; more earthy flavor. |
| Cocoa Powder | Carob powder (use 1:1) | Milder, sweeter, less chocolatey. Not a perfect mimic. |
| Ice Cream | Frozen yogurt or sorbet | Lighter, less creamy; may be more icy. |
How to Make Ice Cream Sandwiches — Step-by-Step
Let’s make these incredible Ice Cream Sandwiches. I’ll guide you through each step with my tried-and-true tips.
Step 1: Prepare Pans
Preheat the oven to 350 degrees. Grease two 8×8 pans with butter or baking spray, then line the bottom with parchment paper, leaving about 4-6 inches of paper hanging over the sides. This sling is crucial for lifting the brownies out cleanly later.
💡 Pierre’s Pro Tip: Use binder clips to hold the parchment in place while you pour the batter.
Step 2: Mix Wet Ingredients
In a medium sized bowl, add melted butter, granulated sugar and brown sugar and mix with your hand mixer on medium speed. The mixture should look well combined and slightly lighter in color.
Step 3: Add Eggs
Add eggs one at a time, mixing after each addition to incorporate. Mix well! This will create the crackled top we all love in brownies. The batter will become thick and glossy.
⚠️ Common Mistake to Avoid: Don’t dump all the eggs in at once—it can break the emulsion and lead to a greasy brownie.
Step 4: Add Extracts
Mix in oil and vanilla extract. The oil adds a touch of extra moisture and helps keep the brownie fudgy after freezing.
Step 5: Combine Dry Ingredients
Combine flour, cocoa powder, and salt in a separate bowl. Reduce speed of mixer to low.
Step 6: Fold Together
In intervals, add flour mixture to wet mixture until all ingredients are incorporated. Do not overmix—just until you see the last streak of flour disappear.
💡 Pierre’s Pro Tip: Fold by hand with a spatula for the last few strokes to avoid developing too much gluten.
Step 7: Bake
Add half the brownie batter to each pan and use a rubber spatula to gently spread it evenly. Bake for 30-40 minutes or until a toothpick inserted into the center comes out just barely clean. Don’t overbake—a few moist crumbs are perfect.
Step 8: Cool Brownies
Remove from the oven. Allow brownies to cool for 10 minutes in the pan. Use parchment paper to carefully lift the brownies out onto a cooling rack. Only peel the parchment off one of the halves. Cool until they reach room temperature completely.
Step 9: Soften Ice Cream
Thaw the ice cream for 5-10 minutes at room temperature. It should be spreadable but not melted.
⚠️ Common Mistake to Avoid: If the ice cream is too soft, it will soak into the brownie and make it soggy. Keep it cold but pliable.
Step 10: Assemble
Return the first half of the brownie to the pan (the one with the parchment paper still on it). Use a large spoon or rubber spatula to spread the ice cream over the top. Use as much or as little as you like. I usually add about 3/4s and see if that’s enough, then add the rest for an indulgent treat.
Step 11: Top and Freeze
Invert the second half of the brownie (the one without parchment) and place it over the top. Cover with aluminum foil or plastic wrap and freeze for at least 6 hours. Overnight is best for a clean cut.
Step 12: Cut and Serve
When ready to cut, remove from the freezer and thaw for 5-10 minutes. Use the parchment paper to lift the entire block out, then use a sharp knife to cut into 8 even squares. Serve immediately.
💡 Pierre’s Pro Tip: Run your knife under hot water and wipe it dry between cuts for the cleanest slices.
| Step | Action | Duration | Key Visual Cue |
|---|---|---|---|
| 1 | Prep pans | 5 mins | Parchment sling in place |
| 2–6 | Mix batter | 10 mins | Thick, glossy batter |
| 7 | Bake brownies | 30–40 mins | Crackled top; toothpick barely clean |
| 8 | Cool brownies | ~1 hour | Room temperature |
| 9–10 | Soften ice cream & assemble | 10 mins | Even ice cream layer |
| 11 | Freeze | 6+ hours | Firm to the touch |
| 12 | Cut & serve | 5 mins thaw + 2 mins cut | Clean, straight edges |
Serving & Presentation
These Ice Cream Sandwiches are a showstopper on any summer dessert table. I like to serve them on a chilled plate or a wooden board for a rustic feel. A sprinkle of flaky sea salt on top just before serving balances the sweetness and adds a sophisticated touch. For an extra special treat, drizzle a little warm chocolate sauce or caramel over the top and add a dollop of whipped cream.
These are best served straight from the freezer—let them sit for 2-3 minutes to soften slightly before diving in. In the summer, I serve them at backyard barbecues and block parties in NYC. They’re a crowd-pleasing alternative to a slice of cake or a bowl of plain ice cream. For an elegant twist, pair them with a shot of espresso or a glass of cold milk.
| Pairing Type | Suggestions | Why It Works |
|---|---|---|
| Side Dish | Fresh berries, a dollop of whipped cream | Adds freshness and lightness. |
| Sauce / Dip | Warm chocolate syrup, salted caramel | Amplifies the indulgence. |
| Beverage | Cold milk, espresso, Moroccan mint tea | Cuts the richness; tea adds aromatic contrast. |
| Garnish | Flaky sea salt, chocolate shavings | Enhances texture and flavor complexity. |
Make-Ahead, Storage & Reheating
Living in NYC means my time is precious, so I always make these ahead for summer parties. The assembled Ice Cream Sandwiches freeze beautifully, making them the ultimate make-ahead dessert.



