Table of Contents
Granny Smith Apple Pie Recipe – Soggy Bottom Crust Solved (NYC-Moroccan Twist)
I thought I knew how to make apple pie until I tried my neighbor’s recipe last fall. Mine always turned out with a soggy bottom crust, while hers was perfectly crisp and golden every single time. I had to know her secret — and after sharing a few cups of mint tea (a taste of my Moroccan upbringing right here in my NYC kitchen), she let me in on a simple trick that changed everything. This Granny Smith apple pie recipe is the result of that conversation, combined with everything I learned at culinary school in Paris about pastry and baking. The key? A genius pre-cooking technique that locks in flavor and banishes sogginess for good.
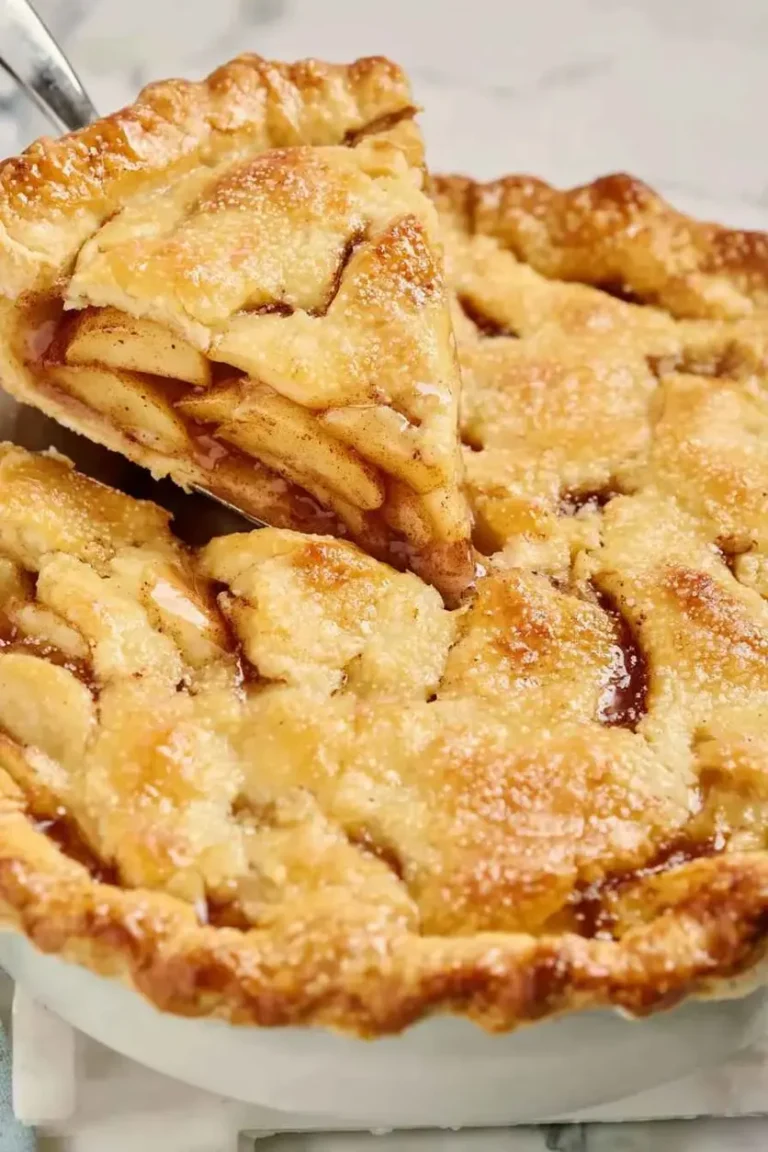
Picture this: a deep golden, flaky crust cradling a filling of tender, tangy-sweet Granny Smith apple slices, glistening with cinnamon and nutmeg, with just a hint of lemon brightness. Each bite brings a satisfying crunch from the crust, a burst of spiced apple juice, and that perfect balance of tart and sweet. The aroma alone — warm cinnamon, caramelized sugar, and butter — will fill your home and have everyone gathering in the kitchen. It’s the kind of pie that sits beautifully on a Thanksgiving table or feels like a cozy Sunday afternoon treat with a scoop of vanilla ice cream.
What sets this version apart is a technique I call the “pre-sweat” method for the apples, inspired by a French compote preparation I learned in Paris. Instead of tossing raw apples into the pie shell and hoping for the best, we gently cook them on the stovetop first. This releases excess moisture, concentrates the apple flavor, and prevents that dreaded soggy bottom. Plus, a touch of lemon zest and a whisper of nutmeg elevate it beyond the ordinary. I’ll also share my favorite pro tip for a foolproof, crisp crust every time — and one common mistake to avoid that home bakers often miss. Let’s make the best Granny Smith apple pie of your life.
Why This Granny Smith Apple Pie Recipe Is the Best
The Flavor Secret: The magic begins with the pre-sweat method. By cooking the sliced Granny Smith apples with sugars, spices, and lemon juice on the stovetop for just 8–10 minutes, you draw out their natural juices and concentrate the apple flavor. This is a technique I learned in Paris for making fruit compotes — it intensifies sweetness and allows the spices to meld beautifully. The result is a filling that tastes like autumn in every bite, with bold, balanced flavor that raw apples simply can’t achieve.
Perfected Texture: No more sad, soggy crust. The pre-cooking step removes up to half a cup of excess liquid from the apples, which means the bottom crust stays crisp and flaky. I also recommend brushing the bottom pie shell with a light egg wash before adding the filling — a trick from my French pastry training that creates a waterproof barrier. The top crust bakes to a beautiful golden brown, and every slice holds together perfectly, no runny filling or collapsing sides.
Foolproof & Fast: This recipe is designed for home cooks of all skill levels. Even if you’ve never made a pie from scratch before, the clear steps and visual cues will guide you to success. The pre-sweat method also means a shorter bake time — your pie is in and out of the oven in just 60 minutes. Plus, using store-bought pie shells (I won’t judge!) makes it incredibly approachable. As I often tell my students in NYC cooking classes, this is the pie that will make you proud to say, “I made it myself.”
Granny Smith Apple Pie Ingredients
Whenever I’m shopping for this Granny Smith apple pie, I head straight to the Union Square Greenmarket in NYC for the freshest apples — but any good grocery store will do. The smell of those tart green apples always takes me back to my mother’s kitchen in Morocco, where she’d use similar ones in her tagines. For this pie, you need simple, high-quality ingredients that let the apples shine.
Ingredients List
- 2 (9-inch) pie shells (homemade or store-bought)
- 7 large Granny Smith apples, peeled, cored, cut into 1/2-inch slices
- 1/2 cup white sugar
- 1/2 cup lightly packed brown sugar
- 2 tbsp all-purpose flour
- 1 tsp ground cinnamon
- 1/8 tsp ground nutmeg
- 1 tbsp lemon juice (freshly squeezed)
- Zest from 1/2 a lemon
- 1 large egg, beaten (for egg wash)
- 2 tbsp sanding sugar, if desired (for topping)
Ingredient Spotlight
Granny Smith Apples: The star of the show! Granny Smiths are firm, tart, and hold their shape beautifully during baking. When shopping, look for apples that are heavy for their size and free from bruises or soft spots. Their high pectin content helps thicken the filling naturally. If you can’t find Granny Smiths, Honeycrisp or Braeburn make good substitutes, but you may need to reduce sugar slightly since they’re sweeter.
Brown Sugar: I use light brown sugar for its molasses depth, which adds a warm, caramel-like note to the filling. Dark brown sugar works too, but it will give a darker color and deeper flavor. Avoid using only white sugar — the molasses in brown sugar is key to that rich autumn taste.
Lemon Zest and Juice: A bright, citrusy lift that balances the sweetness and enhances the apple flavor. Use a Microplane to zest the lemon — it releases the aromatic oils without the bitter white pith. Fresh lemon juice is non-negotiable here; bottled juice lacks that fresh pop.
| Original Ingredient | Best Substitution | Flavor / Texture Impact |
|---|---|---|
| Granny Smith apples | Honeycrisp or Braeburn | Sweeter, slightly softer texture; reduce sugar by 2 tbsp |
| Light brown sugar | Dark brown sugar | Deeper molasses flavor, darker color; works well |
| All-purpose flour | Cornstarch (2 tbsp) | Gluten-free, clearer gel, slightly less thick |
| Egg (for wash) | Milk or cream | Less golden shine; still works for browning |
How to Make Granny Smith Apple Pie — Step-by-Step
Don’t worry — this Granny Smith apple pie is easier than you think, especially with my pre-sweat method. Follow each step, and you’ll be rewarded with a pie that looks and tastes like it came from a bakery.
Step 1: Prepare the Apples
Peel, core, and slice your Granny Smith apples into even 1/2-inch thick slices. I like to use a Y-peeler for the peels — it’s faster and gives a thinner peel. Toss the slices immediately with the lemon juice to prevent browning. Don’t slice them too thin, or they’ll turn mushy. Too thick, and they won’t soften enough during the pre-cook.
💡 Pierre’s Pro Tip: Use a melon baller to core apples — it’s faster than a knife and removes all the seeds and tough bits in one clean motion.
Step 2: Pre-Sweat the Filling
In a large skillet or Dutch oven over medium heat, combine the apple slices, white sugar, brown sugar, flour, cinnamon, nutmeg, and lemon zest. Cook, stirring frequently, for 8–10 minutes until the apples have softened slightly and released their juices. The mixture will become glossy and aromatic. Remove from heat and let cool for 10 minutes — you want it warm, not hot, when it goes into the crust.
⚠️ Common Mistake to Avoid: Skipping the cooling step. If you pour hot filling directly into the pie shell, it can melt the butter in the crust before it even hits the oven, leading to a greasy, tough bottom.
Step 3: Preheat and Prep Crust
Preheat your oven to 375°F (190°C). Place one pie shell in a 9-inch pie dish (if using store-bought, let it sit at room temp for 10 minutes first). Brush the bottom and sides lightly with some of the beaten egg — this is the waterproof barrier I mentioned. It will help keep the crust crisp.
💡 Pierre’s Pro Tip: For an extra-crispy bottom, partially bake the empty pie shell for 8 minutes at 375°F before adding the filling. Let it cool slightly, then add the filling. This is a game-changer for deep-dish pies.
Step 4: Fill and Top
Pour the cooled apple filling into the prepared pie shell, spreading it evenly. Place the second pie shell on top. Crimp the edges together with a fork or your fingers to seal. Cut 4–5 small slits in the top crust for steam to escape — a sharp knife works great. Brush the top crust with the remaining beaten egg and sprinkle generously with sanding sugar.
⚠️ Common Mistake to Avoid: Not cutting enough steam vents. Without enough slits, steam builds up inside and can make the top crust puff unevenly or even crack. At least 4 slits ensures a flat, golden top.
Step 5: Bake to Perfection
Place the pie on a baking sheet (to catch any drips) and bake for 55–60 minutes, or until the crust is deep golden brown and the filling is bubbling through the vents. If the edges brown too quickly, cover them with foil strips or a pie shield after 30 minutes. Let the pie cool on a wire rack for at least 2 hours before slicing — this allows the filling to set, so your slices hold together.
💡 Pierre’s Pro Tip: For a glossy, shiny top crust, brush with a little heavy cream instead of egg wash in the last 5 minutes of baking. It gives a beautiful sheen that screams “bakery-quality.”
| Step | Action | Duration | Key Visual Cue |
|---|---|---|---|
| 1 | Peel, core, slice apples | 15 mins | Even 1/2-inch slices, no browning |
| 2 | Pre-sweat filling | 8–10 mins | Apples slightly softened, glossy, aromatic |
| 3 | Preheat oven, prep crust | 10 mins | Oven at 375°F, crust brushed with egg |
| 4 | Fill and top pie | 5 mins | Filling even, top crust sealed, steam vents cut |
| 5 | Bake | 55–60 mins | Deep golden crust, bubbling filling |
Serving & Presentation
A warm slice of this Granny Smith apple pie is pure comfort. I love serving it with a generous scoop of vanilla bean ice cream — the cold creaminess against the warm, spiced apples is a classic pairing for a reason. Or, if you want to go full French, a dollop of crème fraîche adds a tangy richness that’s divine. For an extra touch, drizzle with a little caramel sauce or dust with cinnamon.
Presentation matters, especially if you’re bringing this to a gathering. I like to let the pie cool completely (at least 2 hours — I know it’s hard!) so the filling sets properly. Then I slice it with a sharp knife, wiping the blade between cuts for clean edges. Arrange the slices on a wooden board or a rustic platter, and serve with your chosen accompaniments. It’s the kind of pie that makes people close their eyes and sigh with happiness — I’ve seen it happen in my own kitchen dozens of times.
| Pairing Type | Suggestions | Why It Works |
|---|---|---|
| Side Dish | Vanilla ice cream, whipped cream | Cold contrast, creamy balance to warm pie |
| Sauce / Dip | Caramel sauce, crème anglaise | Enhances sweetness, adds luxurious texture |
| Beverage | Hot coffee, apple cider, spiced chai | Warm, aromatic complements to apple spice |
| Garnish | Cinnamon stick, fresh mint, lemon zest | Adds visual appeal and fragrant aroma |
Make-Ahead, Storage & Reheating
One of the best things about this Granny Smith apple pie is how well it stores. I often make it a day ahead for holiday dinners — the flavors actually deepen overnight. In my busy NYC life, I love having a pie ready in the fridge for unexpected guests or a quick dessert after a long day. The pre-sweat method helps the filling stay thick and doesn’t get watery even after refrigeration.



