Table of Contents
Galette Dough Recipe: From Scratch, a French‑butter technique
Growing up in Morocco, I learned that a good crust can turn an ordinary meal into a celebration. My mother’s humble galettes, baked over a wood‑fire, carried the aroma of cumin and coriander, while in Paris I mastered the delicate art of cutting cold butter into the flour to achieve that flaky, melt‑in‑your-mouth texture. Now, on the busy streets of New York City, I blend Moroccan spice, French technique, and the vibrant energy of an open‑air farmers’ market into this “Galette Dough” recipe. It’s a buttery, crisp shell made entirely from scratch that can be filled with anything from roasted veggies to sweet berries—perfect for brunch, dinner, or a quick snack.
The dough begins with a simple ratio of flour, salt, and cold butter—each cube a promise of flaky layers. As the mixture turns into coarse crumbs, the ice‑cold water is gradually introduced, keeping the dough cool to preserve that coveted crumb. The result is a light yet sturdy crust that crisps beautifully when baked, with a golden sheen that invites you to fill it with your favorite ingredients.
This version comes from a place of confidence and curiosity. I spent two months experimenting with different butter brands and flour types, finally choosing a blend that balances tenderness with crunch. A quick tip: keep the dough chilled right up until you roll it out to prevent sticking. A common mistake is rushing the cold phase—this leads to a dense crust. My pro tip: use a silicone mat on the dough surface; it keeps the dough from drying out and makes the rolling process smoother.
Why This Galette Dough Recipe Is the Best
The “from scratch” French‑butter technique keeps the dough airy while the Moroccan spice palette gives it depth. Using cold, unblended butter pieces, I achieve a layered flakiness that rivals store‑bought puff pastry but in half the time. The dough’s simplicity lets you adapt the filling from savory to sweet without changing the crust.
The precise 1 ½ cups of flour plus ½ teaspoon of kosher salt creates a balanced base. When the butter is incorporated in 10 cold tablespoons, the crumb becomes light and crisp. This technique, refined in Parisian pâtisseries, is now a staple in my NYC kitchen, where speed and quality go hand in hand.
Because I keep the dough chilled and handle it gently, even a novice can produce a buttery, golden crust. The dough’s forgiving nature means it can be rolled in a short amount of time, perfect for last‑minute galettes before a dinner party or a quick weekend treat.
Galette Dough Ingredients
I source the butter from the local co‑op on 14th Street; the cold, unsalted brand I use holds the moisture better than the standard supermarket butter. The flour is a 55‑grade all‑purpose that holds structure but still yields a tender crumb. A pinch of kosher salt brings out the butter’s natural flavor without overpowering it.
Ingredients List
- 1 ½ cups (213 g) all‑purpose flour, plus extra for dusting
- ½ teaspoon kosher salt
- 10 tablespoons (142.5 g) cold unsalted butter, cube‑cut
- 4–5 tablespoons ice‑cold water
- 1 large egg yolk (for brushing)
Ingredient Spotlight
Cold Unsalted Butter (10 Tbsp) – The cold butter is the key to flaky layers. Look for a firm butter that’s still cold when it hits your hands. If only margarine is available, choose a dairy‑based spread with a high butterfat content, but you’ll get a slightly denser crust.
All‑Purpose Flour (1 ½ cups) – I prefer a 55‑grade flour because it balances gluten development and tenderness. Substitute with pastry flour for extra flakiness, or use a gluten‑free blend for a dietary‑friendly version, adjusting water by 1 Tbsp.
Easter‑Egg Yolk (1 large) – Brushing the crust with yolk before baking gives a glossy, golden finish. Replace with whole egg if you’re aiming for a lighter crust; the extra white will thin the glaze slightly.
| Original Ingredient | Best Substitution | Flavor / Texture Impact |
|---|---|---|
| Cold Unsalted Butter | Dairy‑based spread (high butterfat) | Denser crust, less flake |
| All‑Purpose Flour | Pastry Flour | Extra flaky, tender |
| Whole Egg Yolk | Whole Egg | Slightly lighter crust glaze |
How to Make Galette Dough — Step‑by‑Step
Begin by placing the flour and salt in your food processor. Pulse just enough to combine. The goal is a coarse mix that’s not too fine.
Step 1: Low Pulse
Add the cold butter cubes to the processor. Pulse 8–10 times, watching the butter transition into small pea‑size clumps. This gentle action keeps the butter from melting.
💡 Pierre’s Pro Tip: Use a silicone mat on your countertop when transferring the dough— it prevents sticking and keeps the surface dry.
Step 2: Add Water
Turn the machine on and add 4 tablespoons of ice‑cold water, one tablespoon at a time. Keep the processor running until the mixture starts to hold together.
⚠️ Common Mistake to Avoid: Adding water all at once. It will cause the dough to become sticky and tough.
Step 3: Come Together
When the dough forms a ball, it’s ready. If it’s still dry, add the remaining water a tablespoon at a time until the texture is cohesive but not wet.
💡 Pierre’s Pro Tip: Feel the dough; it should be soft but firm—not doughy or crumbly.
Step 4: Chill
Transfer onto a lightly floured surface, shape into a 4‑inch disc, wrap tightly in plastic, and refrigerate for at least an hour or overnight. Coldness makes rolling effortless.
⚠️ Common Mistake to Avoid: Skipping the chilling step; the dough will become tough and resist rolling.
Step 5: Prepare
Let the dough sit at room temperature for 10 minutes before rolling. Preheat your oven to 425°F (220°C) on the middle rack.
💡 Pierre’s Pro Tip: Line a baking sheet with parchment to simplify transferring and cleaning.
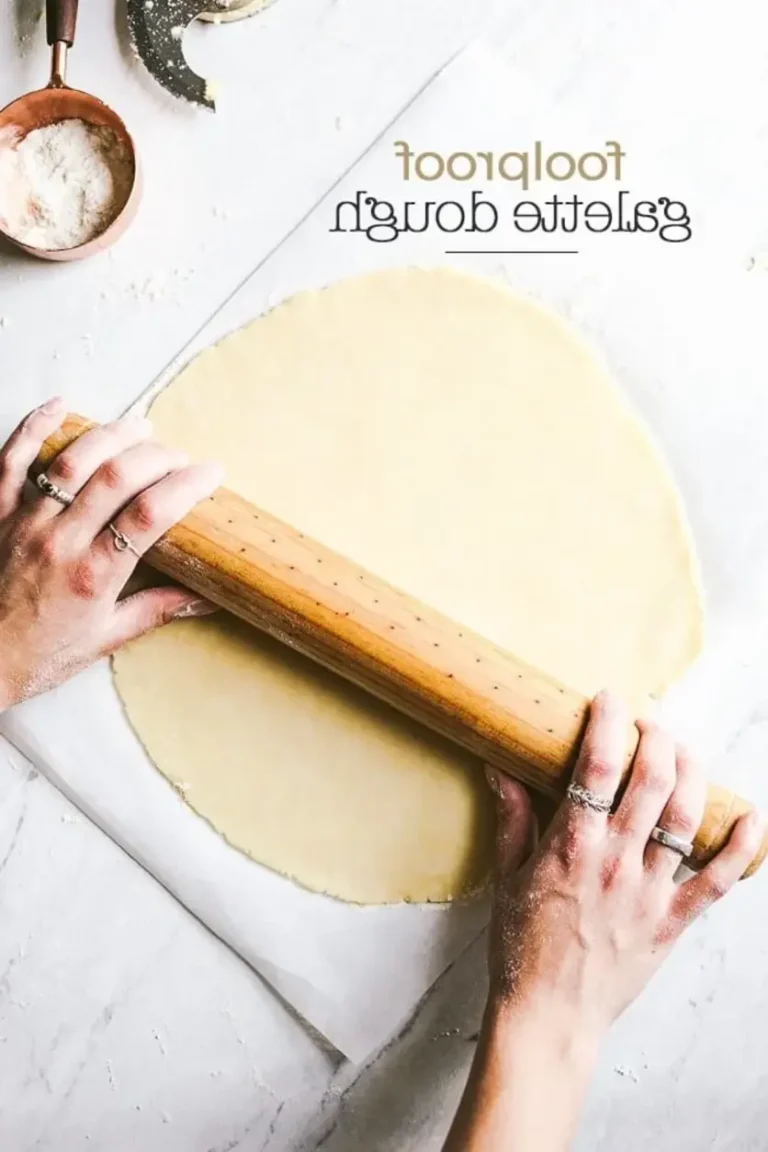
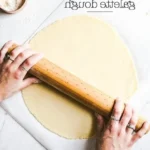
Step 6: Roll Out
On flour‑dusted surface, roll the dough to a 12‑inch circle, keeping the edges slightly thicker than the center to cradle your filling.
⚠️ Common Mistake to Avoid: Over‑rolling, which thins the crust too thin and causes tearing.
Step 7: Place Filling
Arrange your chosen filling—whether a savory medley of roasted root vegetables or sweet berries—within the center, leaving a 3‑inch border. This prevents sauce seeping into the dough.
💡 Pierre’s Pro Tip: For savory, scatter a drizzle of olive oil and sprinkle a pinch of smoked paprika before baking.
Step 8: Fold Sides
Fold the edges of the dough over the filling, pleating loosely as you move around the circle. This creates the classic rustic galette look.
⚠️ Common Mistake to Avoid: Gently forcing the edges together; let them relax for a soft, airy top.
Step 9: Egg Brush
Brush the crust edges lightly with the egg yolk, which yields a glossy, golden finish as it bakes.
💡 Pierre’s Pro Tip: If you want a deeper color, mix a teaspoon of milk into the yolk before brushing.
| Step | Action | Duration | Key Visual Cue |
|---|---|---|---|
| 1 | Combine flour, salt, butter | 3 min | Crumbly mix |
| 2 | Add water incrementally | 5 min | Smooth, cohesive dough |
| 3 | Shape, chill | 1 h | Firm disk |
| 4 | Roll, place filling | 10 min | Smooth center |
| 5 | Fold, brush, bake | 15‑20 min | Golden crust |
Serving & Presentation
Slice the galette with a serrated knife, allowing the buttery layers to separate. Serve hot, perhaps with a simple arugula salad dressed in olive oil and lemon. The crisp crust offers a satisfying crunch, while the filling stays moist and flavorful.
For sweet versions, top the galette with fresh figs, a drizzle of honey, and a dusting of powdered sugar. Pair with a light Moscato or a chilled glass of rosé for an elegant brunch. A splash of espresso on the side elevates a savory galette into a café‑style treat reminiscent of a French brasserie.
| Pairing Type | Suggestions | Why It Works |
|---|---|---|
| Side Dish | Roasted root vegetables, sautéed greens, or a quinoa salad | Adds texture and complementary flavors |
| Sauce / Dip | Béchamel, aioli, or a tangy lemon vinaigrette | Moistens the crust and enhances flavor |
| Beverage | Moscato, rosé, sparkling water with citrus | Light, refreshing contrast to the buttery crust |
| Garnish | Fresh herbs, edible flowers, or a swirl of pesto | Adds color, aroma, and subtle taste |
Make‑Ahead, Storage & Reheating
When the city rushes past my apartment window, I prepare the dough in a batch and store it in the fridge. This way, I can assemble a fresh galette in under half an hour when the evening crowds arrive.
| Method | Container | Duration | Reheating Tip |
|---|---|---|---|
| Refrigerator | Zip‑lock bag or airtight container | 3 days | Reheat 10 min at 375°F (190°C) |
| Freezer | Vacuum sealed bag | 2 months | Thaw overnight, then bake 15 min at 425°F (220°C) |
| Make‑Ahead | Pre‑assembled but unbaked | 10 days | Bake straight from fridge 20 min at 425°F (220°C) |
In my experience, reheating a chilled galette restores its crispness without drying out the filling. A quick 5‑minute broil at the end can add an extra crunch to the crust if you prefer.
Variations & Easy Swaps
| Variation | Key Change | Best For | Difficulty Impact |
|---|---|---|---|
| Savory Squash Variation | Roasted butternut squash, sage, and goat cheese | Fall harvest dishes | Easy |
| Gluten‑Free / Dairy‑Free Variation | Use almond flour and coconut butter | Special dietary needs | Medium |
| Seasonal Autumn Variation | Pumpkin puree, maple syrup, and a pinch of cinnamon | Pumpkin season | Easy |
Savory Squash Variation
Roast cubes of butternut squash until caramelized, then toss with fresh sage, thyme, and a drizzle of olive oil. Layer the mixture atop the crust, sprinkle goat cheese, and bake until golden. The earthy sweetness of squash complements the buttery crumb, creating a hearty yet elegant galette.
Gluten‑Free / Dairy‑Free Variation
Replace all‑purpose flour with an equal weight of almond flour and swap unsalted butter for coconut oil. The dough stays tender but the crumb is slightly denser; the coconut adds a subtle tropical note that pairs wonderfully with savory fillings like spinach and mushroom.
Seasonal Autumn Variation
Incorporate pumpkin puree and a splash of maple syrup into your filling along with a pinch of cinnamon, nutmeg, and allspice. The warm, spiced sweetness transforms the galette into a cozy dessert that feels like a slice of the city’s autumn markets.
What type of dough is best for a galette?
A buttery, flaky dough that holds its shape but remains tender is ideal for galettes. Use cold, unblended butter and all‑purpose or pastry flour. Keeping the dough chilled during shaping prevents sticking and preserves the flaky layers. The technique described here is a classic “French‑butter” method which balances flakiness and structural integrity, making it suitable for both sweet and savory fillings.
Can I make galette dough ahead of time?
Absolutely. Chill the dough for at least an hour or overnight in the fridge, or freeze it in an airtight bag for up to two months. When you’re ready, let the dough sit at room temperature for 10 minutes before shaping, then bake it fresh. Pre‑assemble a galette with the filling and store it in the fridge for up to 10 days; bake straight from the refrigerator and enjoy a crisp crust within minutes.
Is it okay to use store‑bought pastry dough instead?
Store‑bought pastry dough can work as a shortcut, but it often contains additives that alter texture and flavor. The homemade butter‑butter technique gives a pure, buttery taste and a light crumb that’s difficult to replicate with pre‑made dough. If time is scarce, a pre‑rolled puff pastry can substitute, but the result will be flakier and a bit denser, changing the classic galette experience.
What’s the best filling to use with this dough?
Because the crust is neutral and buttery, any filling that compliments it will shine. For savory galettes, think roasted root vegetables, caramelized onions, goat cheese, or a hearty mushroom sauté. For sweet versions, fresh berries, apples with cinnamon, or a custard filling work wonderfully. The dough’s versatility means you can switch seasonal ingredients, making it a staple for any occasion.
How do I prevent the crust from browning too quickly?
Keep the filling moist and use a thin layer of egg yolk glaze. A light brush of yolk before baking gives the crust a gentle color while a short oven time keeps it from over‑browning. You can also tent a piece of foil near the crust if it starts to darken too fast, ensuring a golden but not burnt exterior.
Can I freeze this dough?
Yes, you can freeze the dough for future use. Wrap it tightly in plastic wrap and place it in a vacuum‑sealed bag. It will keep well for up to two months in the freezer. Let it thaw in the fridge overnight, bring it to room temperature for 10 minutes and then shape and bake as per the recipe. The texture remains flaky, though the dough may lose a bit of moisture.
What is a good way to keep the dough from drying out?
After shaping, wrap the dough tightly in plastic wrap or place it in an airtight container. If you’re storing it for a short time, keep it in the fridge. For longer storage, vacuum sealing or wrapping in foil prevents moisture loss. The dough’s buttery structure is best maintained when it stays consistently cool and moist.
What’s the difference between a galette and a pie crust?
A galette uses a free‑form, rustic dough that is not wrapped around a tin, allowing the edges to fold over the filling. The crust is rolled thin and then folded, creating a flaky, uneven top. A pie crust, in contrast, is formed in a pie dish and is typically smoother and more regular. The galette style gives a rustic charm and a more open, airy interior.
Can I add herbs to the dough for extra flavor?
Indeed, adding finely chopped herbs, such as thyme or rosemary, to the flour mixture before adding the butter creates a fragrant crust. The herbs blend with the butter’s richness and give a subtle herbal note that pairs especially well with savory fillings. Just be careful to keep the herbs finely chopped so they don’t interfere with the dough’s delicate structure.
What temperature should I bake galettes at?
A steady 425°F (220°C) is ideal for a golden crust. The high heat cooks the dough quickly, ensuring it crisps without over‑browning the filling. If your oven runs hot, reduce to 400°F (200°C) or tent a portion of the galette with foil to prevent excess browning. The dough’s buttery base reacts best to the 425°F benchmark.
Share Your Version!
I’d love to hear how you twist this galette dough into your own creations. Drop a comment below or rate the recipe with a quick star rating. If you capture a gorgeous slice on Instagram or Pinterest, tag me @spicemingle—I’ll pin your photos to my wall and celebrate your culinary adventure.
Have you experimented with a spice blend other than thyme or used a different cheese? Let me know the one ingredient that changed your galette experience. I’ll answer in the comments!
From my NYC kitchen to yours — I hope this recipe brings as much warmth to your table as it does to mine. — Pierre 🧡
Love This Recipe? Save It to Pinterest!
If you enjoyed this Galette Dough recipe, don’t let it get lost in your browser tabs! 😄 Pin it now so you can find it again anytime — and explore hundreds more tried‑and‑tested recipes waiting for you on my Pinterest boards.
👉 Follow Pierre on Pinterest @chefrecipes2
📌 Pin this recipe · 🔁 Re-pin your favorites · 💬 Tag me when you make it — I love seeing your creations!
Have questions, or want to share your galette story? Drop a comment below and let’s keep the culinary conversation going!
Galette Dough
Description
A delicious galette starts with a buttery galette crust. This is my go-to galette dough recipe that I use for both sweet and savory galette recipes.
Ingredients
- 1 ½ cups (213 gr.) of all-purpose flour, more to flour the surfaces
- ½ teaspoon kosher salt
- 10 tablespoons (142.5 gr.) cold unsalted butter, cut into small cubes
- 4–5 tablespoons ice-cold water
- 1 large egg yolk
Instructions
- To make the galette dough: Place flour and salt in the bowl of a food processor. Pulse for a few times to mix. Add in the cold butter cubes. Pulse 8-10 times until butter resembles small clumps.
- Turn the machine on and add in 4 tablespoons of ice-cold water in one tablespoon increments.
- At this point, it should start to come together and form into a ball. If not add in the rest of the water until it does.
- Transfer onto a lightly floured surface, form it into a 4-inch disk, and wrap with plastic. Place in the fridge for at least 1 hour or overnight.
- Take it out of the fridge 10 minutes before you are ready to roll it out.
- Lightly flour your working surface. Roll the dough into a large 12-inch circle. Transfer onto the parchment paper and then onto the baking sheet.
- Place your filling (depending on the recipe you are using) on top slightly mounting in the middle, leaving a 3-inch border around the edges.
- Roll the sides of the dough overlapping as you go around and pleating the dough.
- Brush the edges of the dough (the outer crust) with egg yolk.
- Bake according to the instructions of the recipe you are using.