Table of Contents
Crème Brûlée Easy Recipe – A Simple 4-Ingredient Classic with a Perfectly Cracked Top
I still remember the first time I cracked the caramelized top of a perfect crème brûlée at a tiny bistro in Paris. I was fresh out of culinary school, nervous and excited, and that first spoonful—creamy custard beneath a shattering layer of burnt-sugar crunch—convinced me that French pastry was my calling. This Easy Crème Brûlée is the recipe I turn to now, whether I’m cooking for a cozy date night in my New York City apartment or hosting friends from the farmers market. It uses just four simple ingredients, yet delivers that same rich, velvety texture with a crisp, golden topping that feels so special. The secret? A gentle water bath in the oven ensures the custard sets evenly without curdling—a technique I learned from a pâtissier in Montmartre.
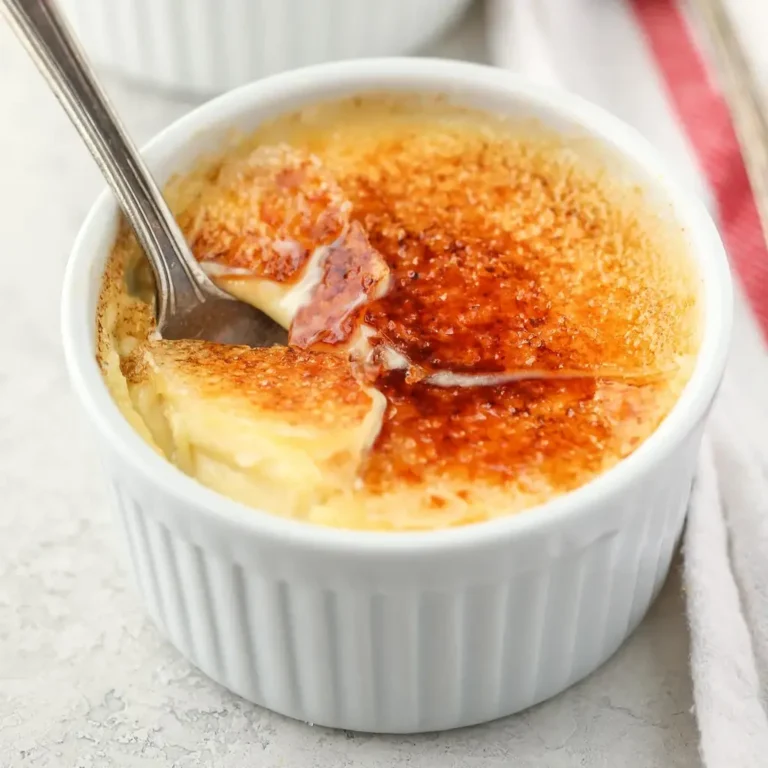
Imagine dipping your spoon into a shallow ramekin and hearing that satisfying crack. Beneath the brittle, sugary shell lies a custard so smooth it almost melts on your tongue, with deep notes of vanilla and cream. The aroma of caramelizing sugar fills your kitchen, mixing with the faintest hint of eggy richness. I love how this dessert balances elegance with comfort—it’s impressive enough for a dinner party, yet simple enough to make on a Tuesday. The contrast between the warm, torched topping and the chilled custard is pure magic, and I promise, once you master the technique, you’ll never buy a store-bought version again.
As a professional cook trained in both French and Moroccan cuisines, I’ve tested countless crème brûlée recipes over the years. This one stands out because it’s foolproof: no water bath spills, no curdled eggs, and a caramelization that stays crunchy for hours. My Pierre’s Pro Tip? Use a kitchen torch instead of the broiler for complete control—it gives you that perfect amber finish every time. One common mistake home cooks make is skipping the straining step, which leaves lumps in the custard. Don’t worry—I guide you through every detail below. From my NYC kitchen to yours, let’s make this classic dessert together.
Why This Crème Brûlée Recipe Is the Best
The Flavor Secret – This recipe relies on pure, high-quality ingredients: heavy cream, egg yolks, sugar, and vanilla. The simplicity lets the natural flavors shine. In my Paris training, I learned that warming the cream gently before mixing it with the eggs helps emulsify the custard, creating a silkier texture without any graininess. I also love adding a touch of vanilla extract—it’s more approachable for American home cooks than vanilla beans, but the flavor is still rich and authentic.
Perfected Texture – The key to a silky crème brûlée is the water bath, or bain-marie. It insulates the custard, allowing it to bake slowly and evenly. I bake mine at 325°F until the edges are set but the center still jiggles like a soft gelatin. This ensures a tender, creamy interior—never rubbery. The slow cooling process also prevents cracking, so you get a perfect surface for that caramelized sugar.
Foolproof & Fast – With only 15 minutes of active prep, this dessert is surprisingly easy for beginners. The hardest part is waiting for it to chill! I’ve streamlined the process: no need for double boilers or complicated steps. Just whisk, temper, strain, bake, and chill. The torch technique at the end is instant gratification—you get that dramatic crackle in seconds. It’s the kind of recipe that makes you feel like a professional chef, even on your first try.
Crème Brûlée Ingredients
When I make this crème brûlée in my NYC kitchen, I always source the best ingredients I can find. I love buying heavy cream from the farmers market at Union Square—it’s thick and fresh. The vanilla extract I bring back from trips to Paris, but any pure vanilla extract works beautifully. The egg yolks should be from large eggs, and I prefer organic for their brighter color and richer flavor. The sugar is simple granulated—nothing fancy needed for the custard or the topping.
Ingredients List
- 6 large egg yolks
- 1/3 cup (70 grams) granulated sugar
- 2 cups (480 ml) heavy whipping cream
- 1 and 1/2 teaspoons pure vanilla extract
- 2 tablespoons (25 grams) granulated sugar (for the topping)
Ingredient Spotlight
Heavy Whipping Cream – This is the backbone of the custard. Look for heavy cream with at least 36% milkfat for the richest texture. In the US, brands like Organic Valley or Horizon work well. If you can’t find heavy cream, you can substitute half-and-half mixed with a tablespoon of melted butter, but the texture will be less creamy. Avoid ultra-pasteurized cream if possible—it can have a slightly cooked flavor.
Egg Yolks – The yolks provide richness and structure. Use fresh, large eggs. The color of the yolk matters less than freshness—older eggs can produce a slightly watery custard. A trick I learned in Paris: gently warm the yolks to room temperature before mixing to ensure smooth emulsification. Substitution: If you need a dairy-free version, you can try using full-fat coconut milk, but the texture will be denser and have a coconut undertone.
Vanilla Extract – Pure vanilla extract is non-negotiable for the best flavor. Imitation vanilla gives a harsh, artificial taste. I love using Madagascar vanilla for its floral, creamy notes. For a special twist, you can scrape the seeds from a vanilla bean and steep it in the warm cream for 10 minutes before straining—this adds beautiful speckles. Substitution: Vanilla bean paste is a great alternative—use the same amount.
| Original Ingredient | Best Substitution | Flavor / Texture Impact |
|---|---|---|
| Heavy whipping cream | Half-and-half + 1 tbsp melted butter | Less rich, slightly thinner custard |
| Egg yolks (6 large) | 5 large egg yolks + 1 whole egg | Firmer texture, slightly less silky |
| Pure vanilla extract | Vanilla bean paste or 1 vanilla bean | More intense vanilla flavor with specks |
| Granulated sugar (custard) | Superfine sugar | Dissolves faster, same sweetness |
| Granulated sugar (topping) | Turbinado or demerara sugar | Coarser crystals, crunchier caramel |
How to Make Crème Brûlée — Step-by-Step
Don’t be intimidated—this process is simpler than you think. Follow each step, and you’ll be rewarded with a dessert that looks and tastes like it came from a high-end restaurant.
Step 1: Preheat and Prepare
Preheat your oven to 325°F (163°C). Fill a large pot with water and bring it to a gentle boil—you’ll use this for the water bath later. While the water heats, gather your ingredients. This mise en place step makes everything go smoothly.
💡 Pierre’s Pro Tip: Use a kettle to boil the water so you have it ready to pour into the baking pan without juggling heavy pots.
Step 2: Whisk the Egg Yolks and Sugar
In a large mixing bowl, whisk together the egg yolks and 1/3 cup of granulated sugar until well blended and just starting to lighten in color—about 1 to 2 minutes. You’re not looking for a thick ribbon stage like for a sabayon; just a smooth, pale mixture. Over-whisking can incorporate too much air, which can cause bubbles in the custard.
⚠️ Common Mistake to Avoid: Don’t let the egg-sugar mixture sit too long before adding the cream—sugar can start to “cook” the yolks, creating grainy bits.
Step 3: Heat the Cream
Pour the heavy whipping cream into a medium-sized saucepan and heat over medium heat. Stir occasionally until the cream is warm and small bubbles form around the edges—don’t let it boil vigorously. Remove from the heat immediately and stir in the vanilla extract. The cream should be hot but not scalding, around 140-150°F.
💡 Pierre’s Pro Tip: If you don’t have a thermometer, test the cream by dipping your finger—it should feel very warm but not burning. Boiling the cream can curdle the eggs later.
Step 4: Temper the Eggs
Slowly pour about 1/2 cup of the warm cream into the egg and sugar mixture, whisking constantly as you pour. This is called tempering—it gently raises the temperature of the yolks so they don’t scramble when you add the rest of the hot cream. Then, slowly pour in the remaining cream, continuing to whisk until fully combined. If you see foam on top, skim it off with a spoon—this prevents bubbles in the final custard.
⚠️ Common Mistake to Avoid: Pouring the hot cream too quickly into the eggs—always start slow and whisk vigorously to ensure even heating.
Step 5: Strain and Fill Ramekins
Pour the mixture through a fine-mesh strainer into a clean bowl or large measuring cup. This removes any cooked egg bits or foam, guaranteeing a silky texture. Evenly distribute the strained custard between four 6-ounce ramekins. Tap each ramekin gently on the counter to release any air bubbles.
💡 Pierre’s Pro Tip: Use a kitchen torch to quickly pop any surface bubbles before baking—this gives you a perfectly smooth top for caramelizing.
Step 6: Create the Water Bath
Place the ramekins inside an 8-inch square baking pan (or any larger pan). Pour the boiling water into the baking pan until it reaches about halfway up the sides of the ramekins. Be careful not to splash water into the custards. The water bath insulates the custard, preventing it from baking too quickly or curdling.
⚠️ Common Mistake to Avoid: Adding too much water—if the water reaches the rims of the ramekins, it can seep into the custard and make it watery. Halfway up the sides is perfect.
Step 7: Bake to Perfection
Carefully place the baking pan in the oven. Bake at 325°F for 35 to 45 minutes, or until the edges are set and the center is slightly jiggly—like a soft gelatin. Don’t overbake; the custard will continue to set as it cools. Remove the ramekins from the water bath using tongs or pot holders and transfer to a wire rack to cool completely. Once cooled, cover tightly with plastic wrap and refrigerate for at least 4 hours or overnight.
💡 Pierre’s Pro Tip: To test doneness, gently shake a ramekin—the center should wobble like a light Jell-O. If the whole thing is still liquid, bake for 5 more minutes and check again.
Step 8: Caramelize and Serve
Just before serving, remove the custards from the fridge. Blot the tops with a paper towel to remove any condensation—this ensures the sugar sticks. Sprinkle 1 and 1/2 teaspoons of sugar evenly over each custard. Use a kitchen torch to caramelize the sugar, moving the flame in a circular motion until the sugar is amber and bubbling. Let the sugar harden for 1 to 2 minutes, then serve immediately.
⚠️ Common Mistake to Avoid: Using the broiler instead of a torch—the broiler heats unevenly and can cook the custard before the sugar caramelizes. A torch gives you precise control.
| Step | Action | Duration | Key Visual Cue |
|---|---|---|---|
| 1 | Preheat oven & boil water | 5 mins | Oven at 325°F, water boiling |
| 2 | Whisk yolks & sugar | 2 mins | Pale yellow, slightly thickened |
| 3 | Heat cream & vanilla | 5 mins | Bubbles around edges, warm aroma |
| 4 | Temper eggs with cream | 2 mins | Smooth liquid, no scrambled bits |
| 5 | Strain & fill ramekins | 3 mins | Clear custard, no lumps |
| 6 | Water bath & bake | 35-45 mins | Edges firm, center jiggly |
| 7 | Cool & chill | 4+ hours | Firm custard, no movement |
| 8 | Torch & serve | 2 mins | Amber, bubbling sugar |
Serving & Presentation
Crème brûlée is a showstopper on its own, but I love pairing it with simple accompaniments that complement its richness. In my NYC apartment, I often serve it with fresh berries—raspberries or sliced strawberries—for a pop of color and acidity that cuts through the cream. A light dusting of powdered sugar around the plate adds elegance. For a Moroccan-inspired touch, I sometimes sprinkle a pinch of cinnamon or cardamom over the berries before serving.
The key to presentation is contrast: the glossy caramel top should be the star. I like to serve the custards on small plates with a delicate cookie, like a madeleine or tuile, on the side. If I’m feeling festive, I’ll add a dollop of lightly sweetened whipped cream—though that’s optional. Remember to crack the top at the table for that dramatic sound—it’s part of the experience!



