Table of Contents
5‑Minute Peanut Butter Mousse with Parisian Folding Technique – Quick Decadent Dessert
Growing up in the bustling souks of Marrakech, I learned that a simple pantry item could turn into a feast with the right touch. Years later, on a rain‑slick rooftop in Brooklyn, I blended that first lesson with the precision of a French pastry class to create the 5‑Minute Peanut Butter Mousse. The key is a Parisian folding technique that lifts the batter into a cloud‑like, silky texture.
The mousse arrives as a velvet ribbon of chocolate‑sweetness, its interior soft as the cedar wood of old Moroccan caravans and its exterior pale sway reminiscent of a candlelit Parisian café. The aroma of toasted peanut butter mingles with vanilla, while the delicate layers respond to every spoonful with a gentle unspooling of flavor.
What sets this version apart is the gentle folding of whipped heavy cream—an approach I learned from my pastry teacher, chef Lise. It allows the mousse to hold its airy silhouette, and my quick speed trick keeps the recipe under ten minutes. A common pitfall? Over‑whipping the cream; if you go past the soft‑peak stage, the mousse falls flat. To avoid that, simply keep an eye on the peaks before they grow stiff.
Why This 5‑Minute Peanut Butter Mousse Recipe Is the Best
The flavor secret is the dual pairing of smooth peanut butter with the tang of softened cream cheese, a balance I first mastered in my Moroccan mother’s kitchen. The marriage of nutty sweetness with a slight tang creates a depth that ordinary peanut chocolate desserts lack.
The perfected texture comes from a precise folding rhythm I refined in Paris. Instead of whisking, I gently fold in small dollops of stiff‑peaked cream. This technique prevents the mixture from deflating while giving it a luxuriously airy bite that melts in your mouth.
Foolproof and fast, the recipe eliminates the need for a stand mixer; hand mixing does it all, making it ideal for a city dweller who craves dessert without kitchen downtime.
Peanut Butter Mousse Ingredients
I usually source my ingredients at the Union Square Greenmarket and, for the peanut butter, I drop by Trader Joe’s because their smooth variety stands up to blending. My mother in Morocco always swore by homemade peanut butter, but nowadays the store version is a convenient and reliably creamy base.
Ingredients List
- 1 cup smooth peanut butter (plain) – choose a brand with no added oils.
- 1 cup cream cheese (softened to room temperature) – the creaminess is key.
- 1 cup powdered sugar – for a silky sweet finish.
- 1 cup heavy cream – whipped to stiff peaks.
Ingredient Spotlight
Peanut Butter – Acting as the flavor base, this should be 100% peanuts, no added sugar or salt. In the U.S., you’ll find brands like Skippy or Jif; for a more rustic vibe, look for local artisan butter at your farmers market.
Cream Cheese – It provides a tang that cuts through the sweetness. Search for the “soften” tag at the dairy aisle; substituting with Greek yogurt would make it acidic but also more tart.
Powdered Sugar – The fine sugar dissolves without clumping. A good alternative is coconut sugar powder; it adds a subtle caramel note.
Heavy Cream – The secret to airy texture. If you’re in the U.K., you can replace it with double‑cream or pour‑over cream; the richer the fat, the fluffier the mousse.
| Original Ingredient | Best Substitution | Flavor / Texture Impact |
|---|---|---|
| Smooth peanut butter | Peanut butter with no added sugar | No change; still smooth |
| Cream cheese | Rich creamy Greek yogurt | Tangier, slightly denser but still silky |
| Powdered sugar | Coconut sugar powder | Caramel undertone, slightly thicker |
| Heavy cream | Whole milk + butter (2:1) | Less airy, but still fluffy |
How to Make 5‑Minute Peanut Butter Mousse – Step‑by‑Step
This mushroom of flavor rises within minutes with simple hand‑mixing and a practiced folding rhythm.
Step 1: Beat the Base
In a large mixing bowl, combine the peanut butter, softened cream cheese, powdered sugar, and a splash of vanilla extract. Beat on medium speed until the mixture is silky and homogeneous. Let it rest for one minute so the flavors meld.
💡 Pierre’s Pro Tip: Warm the peanut butter in the microwave for 10-15 seconds before mixing—it reduces viscosity and ensures silky incorporation.
Step 2: Fold the Cream
Separate ¼ of the freshly whipped heavy cream. Gently fold it into the base using a silicone spatula, pushing in a gentle “Lasagna” motion to keep the batter airy. Then add the remaining whipped cream in two more folds, gradually building volume.
⚠️ Common Mistake to Avoid: Over-whipping the heavy cream past the soft-peak stage can turn it into butter; keep the peaks firm but not buttery.
Step 3: Pipe & Chill
Transfer the mousse into a piping bag fitted with a swirly tip. Pipe the airy ribbons into mason jars or glass cups. You may enjoy immediately or refrigerate for at least 30 minutes to let the mousse set.
💡 Pierre’s Pro Tip: Use a small round tip for elegant swirls reminiscent of Parisian patisseries; this adds a chic visual appeal.
| Step | Action | Duration | Key Visual Cue |
|---|---|---|---|
| 1 | Beat peanut butter and cream cheese mix | 2 min | Smooth, glossy batter |
| 2 | Fold in whipped cream in 3 passes | 1 min | Lifting, airy peaks |
| 3 | Pipe into jars & chill | 30 min | Ribbons set within the jar |
Serving & Presentation
Serve the mousse straight from the jar with a drizzle of dark chocolate ganache or a dusting of toasted cocoa nibs to heighten the chocolate undertone. A little splash of sea salt on top can balance the sweetness and adds an unexpected crunch bite.
For a festive twist, crown each portion with a tuft of shredded coconut and a sprig of fresh mint—ingredients I earnestly gathered at the Brooklyn farmers market. Their bright green hue counterbalances the cocoa’s depth while offering an airy crisp.
This dessert complements light salads, fresh berries, or a crisp glass of rosé. The decadence is restrained, which makes it the ideal finishing touch for a bustling New York dinner.
| Pairing Type | Suggestions | Why It Works |
|---|---|---|
| Side Dish | Mixed greens with vinaigrette, fruit salsa, charred asparagus | Fresh acidity cuts the richness. |
| Sauce / Dip | Caramelized banana coulis, raspberry sauce, salted caramel | Adds contrast and depth. |
| Beverage | Sparkling wine, iced coffee, peppermint tea | Crisp bubbles or cool steam unify textures. |
| Garnish | Chocolate shavings, toasted nuts, edible flowers, fresh mint | Adds visual pop and a hint of crunch. |
Make‑Ahead, Storage & Reheating
Quick prep is my darling in the busy NYC life, but sometimes you need to plan ahead. I mark each jar with the prep date so I know when it’s freshest. When I need a dessert between meetings, I simply re‑chill the jar for an hour.
| Method | Container | Duration | Reheating Tip |
|---|---|---|---|
| Refrigerator | Mason jar | 3 days | No reheating required. |
| Freezer | Glass jar | 2 months | Thaw 4 hours in fridge. |
| Make‑Ahead | Paper cup | 1 day in advance | Assemble fresh in the morning. |
If you’re planning a brunch, I’ll pre‑fold the cream and mix into jars, leaving the top flat for a smoother finish when you’re ready to serve. Just remember to keep the mixture chilled until the last moment for best texture.
Variations & Easy Swaps
| Variation | Key Change | Best For | Difficulty Impact |
|---|---|---|---|
| Dark‑Chocolate Drizzle | Swirl mini hot chocolate over mousse | Gourmet crowd | Easy |
| Gluten‑Free / Dairy‑Free | Use coconut cream & nut butter | Allergy guests | Medium |
| Pumpkin‑Spice Twist | Add 1 tsp pumpkin puree & cinnamon | Autumn season | Easy |
Dark‑Chocolate Drizzle
A simple swirl of deep‑dark chocolate melted over the mousse adds a bittersweet finish that balances the creamy sweetness—think a drizzle you might see in a high‑end French patisserie. The bright swirl, inspired by my time in Paris, looks as elegant as it tastes.
Gluten‑Free / Dairy‑Free Variation
Replace the heavy cream with coconut cream and the cream cheese with a dairy‑free version. The mousse becomes a bit richer and has a subtle coconut undertone, but the folding technique still gives that airy lift. I tested this version for my dairy‑allergic friend, and she fell in love.
Seasonal Spice Twist
During the New York fall harvest, I added vanilla‑infused pumpkin puree and a pinch of nutmeg, giving the mousse a comforting, seasonal flavor. The earthy spice complements the nutty base like an old friend’s hug.
Can I make this mousse ahead of time?
I love prepping desserts on Sunday afternoons. This mousse keeps well in the refrigerator for up to three days—just keep it jar‑sealed. If you’re feeling adventurous, you can freeze it for up to two months in a glass jar, then thaw in the fridge overnight. The airy texture will remain intact if you chill it properly.
What can I use instead of peanut butter?
For a buttery mouthfeel you could swap peanut butter with almond butter or sunflower seed butter. Keep the ratio at 1 cup for consistency. The flavor profile will change; almond offers a milder, floral note, while sunflower gives a nuttier, earthy taste. Just be sure the alternative is smooth and unsalted.
For a buttery mouthfeel you could swap peanut butter with almond butter or sunflower seed butter. Keep the ratio at 1 cup for consistency. The flavor profile will change; almond offers a milder, floral note, while sunflower gives a nuttier, earthy taste. Just be sure the alternative is smooth and unsalted.
Is this recipe gluten‑free?
Absolutely. All ingredients are naturally gluten‑free—peanut butter, cream cheese, powdered sugar, heavy cream. The only potential issue is cross‑contamination in a shared kitchen. I recommend using clean utensils and a dedicated mixing bowl if you’re cooking for guests with celiac disease.
How long does it keep in the fridge?
The mousse should be consumed within 72 hours after refrigeration. Beyond that, the texture may start to settle, and the peanut flavor will become slightly flat. I usually store it in a tightly sealed mason jar, which keeps humidity out and preserves freshness.
Why does my mousse feel heavy instead of airy?
A common reason for density is over‑whipped cream, especially if you let the peaks slump or keep whisking past stiff peaks; the fat separates and makes the mousse denser. Additionally, letting your peanut butter or cream cheese set for too long in the fridge can make them firmer and harder to fold. Keep them at room temperature just before mixing and fold quickly.
Can I add vanilla flavor to this mousse?
Yes—elevate the flavor by adding one teaspoon of pure vanilla extract into the base. If you prefer a sweeter, more fragrant note, sprinkle a pinch of ground vanilla beans or use vanilla‑infused cream after folding. The vanilla compliments the nutty base while brightening the overall profile.
Can I freeze this mousse?
Freezing is perfectly fine. Place the mousse in a sturdy glass jar, seal, and freeze up to 60 days. When you’re ready to enjoy, let it thaw in the fridge overnight. After thawing, stir gently to reintegrate any settled cream—then enjoy exactly as fresh.
Where should I store the mousse if I want it ready at dinner?
The best option is to store the finished mousse in an airtight jar in the fridge. Keep it at 35–40 °F (1–4 °C) and it will stay set for 2–3 days. If I need it a day earlier, I can pipe fresh portions and put them in a separate jar to make sure they stay crisp and airy.
Share Your Version!
I’d love to hear your takes on this mousse—whether you liven it up with a citrus zest, swap in your favorite nut butter, or experiment with a grain‑free base. Drop a star rating, share a comment, or post your photo on Instagram or Pinterest and tag my handle @spicemingle. If you try a new twist, tell me, “What did you add, and how did it enhance the flavor?” I’m always curious to learn from fellow food lovers.
From my NYC kitchen to yours — I hope this recipe brings as much warmth to your table as it does to mine. — Pierre 🧡
Love This Recipe? Save It to Pinterest!
If you enjoyed this 5‑Minute Peanut Butter Mousse recipe, don’t let it get lost in your browser tabs! 😄 Pin it now so you can find it again anytime — and explore hundreds more tried‑and‑tested recipes waiting for you on my Pinterest boards.
👉 Follow Pierre on Pinterest @chefrecipes2
📌 Pin this recipe · 🔁 Re-pin your favorites · 💬 Tag me when you make it — I love seeing your creations!
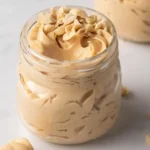
5-Minute Peanut Butter Mousse
Description
This peanut butter mousse is smooth, airy, and so darn easy to make. All you need are 4 ingredients, and its ready in minutes! Watch the video below to see how I make it in my kitchen!
Ingredients
- 1 cup peanut butter (smooth * See notes)
- 1 cup cream cheese (softened)
- 1 cup powdered sugar
- 1 cup heavy cream
Instructions
- In a large mixing bowl, beat together the peanut butter, cream cheese, powdered sugar, and vanilla extract and set aside. In a separate mixing bowl, beat together the heavy cream until stiff peaks form.
- Gently beat through ¼ of the whipped heavy cream into the peanut butter mixture. Fold through another ½ of the cream and mix well. Add the remaining cream until combined.
- Transfer the mousse into a piping bag with a swirly tip. Pipe into mason jars or glass jars enjoy immediately or refrigerate for at least 30 minutes.