Table of Contents
Szechuan Sauce Recipe – Bold, Sweet & Savory in 15 Minutes
I still remember the first time I tasted a truly great Szechuan sauce — it was at a tiny noodle joint in New York’s Chinatown, and the balance of sweet, savory, and heat was so perfect I could have eaten it with a spoon. That moment brought me right back to my mother’s kitchen in Morocco, where she’d use a similar blend of bold spices and sweeteners to create sauces that woke up every ingredient they touched. This Szechuan sauce recipe captures that same magic: a quick, 15-minute sauce that’s just as comfortable on a weeknight stir-fry as it is as a dipping sauce for dumplings. With soy sauce, fresh ginger, and chili garlic sauce at its core, this isn’t just any homemade Szechuan sauce — it’s the one I’ve tweaked over hundreds of batches to get just right.
What I love most about this sauce is its complexity. The first hit is a deep, umami-rich savoriness from the soy sauce, followed by a gentle sweetness from brown sugar that lingers on your tongue. Then comes the warmth — not a scream of heat, but a slow, pleasant burn from the chili garlic sauce and red pepper flakes that builds beautifully. Fresh ginger adds a bright, almost citrusy note that cuts through the richness, while the rice vinegar and red wine vinegar bring a subtle tang that keeps every bite exciting. The texture is another win: a silky, glossy finish that clings perfectly to noodles or rice, thanks to the cornstarch slurry. It’s the kind of sauce that makes even a simple weeknight dinner feel like a restaurant-quality meal.
I’ve tested this recipe dozens of times in my own kitchen, and I can tell you that the secret lies in balancing the ingredients and nailing the thickening. Over the years, I’ve learned that a fresh ginger paste, made by grating the root on a microplane, releases far more flavor than pre-minced ginger from a jar. And while many recipes skip the slurry step or add cornstarch directly to the pot, my Paris-trained technique of dissolving it in cold broth first ensures a lump-free, velvety texture every time. 💡 Pierre’s Pro Tip: Don’t rush the simmer — letting the sauce bubble gently for a few minutes mellows the raw garlic and ginger, creating a deeper, more rounded flavor. Avoid the common mistake of adding chili garlic sauce too early, or the heat can become harsh.
Why This Szechuan Sauce Recipe Is the Best
The secret to this Szechuan sauce is the way I layer the flavors. Growing up in Morocco, I watched my mother build sauces by adding ingredients in stages — first the aromatics, then the liquids, then the finishing touches. I apply the same approach here: simmering the soy sauce, vinegars, ginger, and sugar together before thickening. This allows the flavors to marry and deepen, rather than just tasting like a simple mix. It’s a technique I honed in Paris, where we’d spend hours perfecting a single sauce base. The result is a sauce that tastes like it’s been simmering for an hour, not ten minutes.
Texture is where many homemade Szechuan sauces fall short — they’re either too watery or pasty. My method uses a cornstarch slurry that’s whisked in at the very end, giving you complete control. The cornstarch is dissolved in cold chicken broth first, which prevents clumps and creates a glossy, smooth consistency that coats the back of a spoon perfectly. This technique comes straight from my Paris culinary training, where we learned that a slurry must be stirred continuously while being added to a hot liquid. It’s a small step, but it makes all the difference in achieving that professional-grade finish.
Foolproof and fast is what I aim for in all my recipes, and this one delivers. With just 15 minutes and a single saucepan, even a beginner can create a sauce that rivals anything from a takeout spot. The ingredients are all pantry-friendly — low-sodium soy sauce, red wine vinegar, brown sugar, rice vinegar, chili garlic sauce, and cornstarch — and they come together without any complicated techniques. I’ve taught this to friends who claim they can’t cook, and every single one has been amazed at the result. If you can stir and simmer, you can make this Szechuan sauce.
Szechuan Sauce Ingredients
I pick up most of these ingredients at my local NYC farmers market or the Asian grocery on Canal Street. The fresh ginger from the market has a zing that dried powder just can’t match. For the chili garlic sauce, I usually grab a jar of Huy Fong — it’s a pantry staple in my kitchen. Here’s everything you’ll need for this bold, balanced sauce.
Ingredients List
- 1/4 cup low-sodium soy sauce
- 2 tablespoons red wine vinegar
- 1 tablespoon fresh ginger (minced)
- 2 tablespoons brown sugar
- 1 tablespoon Asian chili garlic sauce (or chili sauce)
- 1 tablespoon rice vinegar
- 1/2 teaspoon crushed red pepper flakes
- 1/2 teaspoon garlic powder
- 1/2 cup chicken broth (veggie broth for vegetarian)
- 1 tablespoon cornstarch
Ingredient Spotlight
Soy sauce is the backbone of this sauce, providing deep umami and saltiness. I always use low-sodium so I can control the salt level — full-sodium versions can make the sauce overly salty, especially when reduced. If you only have regular soy sauce, reduce the amount by a tablespoon and add water to compensate. Fresh ginger is non-negotiable here; its bright, spicy warmth can’t be replicated by the dried stuff. Look for ginger that’s firm, with smooth skin and a strong, peppery aroma. In a pinch, you can use 1 teaspoon of ground ginger, but the flavor will be less vibrant and slightly dusty.
Chili garlic sauce brings the signature heat and a subtle fermented depth. Huy Fong brand is widely available in US supermarkets and provides a balanced level of spice. If you prefer a milder sauce, start with 2 teaspoons and adjust upward. For a different flavor profile, try sambal oelek, which has a similar heat but less garlic. Red pepper flakes add an extra layer of heat that blooms in the simmering liquid, so be careful not to overdo it. Rice vinegar and red wine vinegar work together to provide acidity that brightens the richness of the soy and brown sugar. Rice vinegar is milder and slightly sweet, while red wine vinegar adds a stronger, fruitier note — the combination is key to the sauce’s complexity.
| Original Ingredient | Best Substitution | Flavor / Texture Impact |
|---|---|---|
| Low-sodium soy sauce | Tamari (gluten-free) | Slightly richer; reduce by 1 tbsp |
| Fresh ginger (minced) | 1 tsp ground ginger | Less bright, more dusty flavor |
| Chili garlic sauce | Sambal oelek + 1 clove minced garlic | Similar heat; less garlicky |
| Rice vinegar | Apple cider vinegar | Fruitier, slightly sharper tang |
| Chicken broth | Vegetable broth (for vegetarian) | Slightly less savory; still excellent |
How to Make Szechuan Sauce — Step-by-Step
This sauce comes together quickly, so have all your ingredients prepped and measured before you start. Here’s how to get that perfect balance every time.
Step 1: Prepare the Slurry
In a small bowl, whisk together the chicken broth and cornstarch until the cornstarch is completely dissolved. The mixture should be smooth with no lumps. This slurry will thicken your sauce at the end, giving it that gorgeous glossy finish. Set it aside near the stove — you’ll need it later.
💡 Pierre’s Pro Tip: Use cold broth for the slurry — warm liquid can cause the cornstarch to clump before it dissolves. I learned this trick in Paris, where we always kept a chilled bowl of stock for starches.
Step 2: Simmer the Base
In a medium saucepan over medium heat, combine the soy sauce, red wine vinegar, rice vinegar, minced ginger, brown sugar, chili garlic sauce, red pepper flakes, and garlic powder. Stir everything together and bring it to a gentle boil. You’ll see small bubbles rising across the surface — that’s your signal. Reduce the heat to low and let it simmer for 3–4 minutes. This slow simmer allows the ginger and garlic to mellow and the flavors to meld beautifully.
⚠️ Common Mistake to Avoid: Don’t let the sauce boil vigorously, or the sugar can caramelize and burn, making the sauce bitter. Keep the heat medium and watch for that gentle simmer.
Step 3: Thicken and Finish
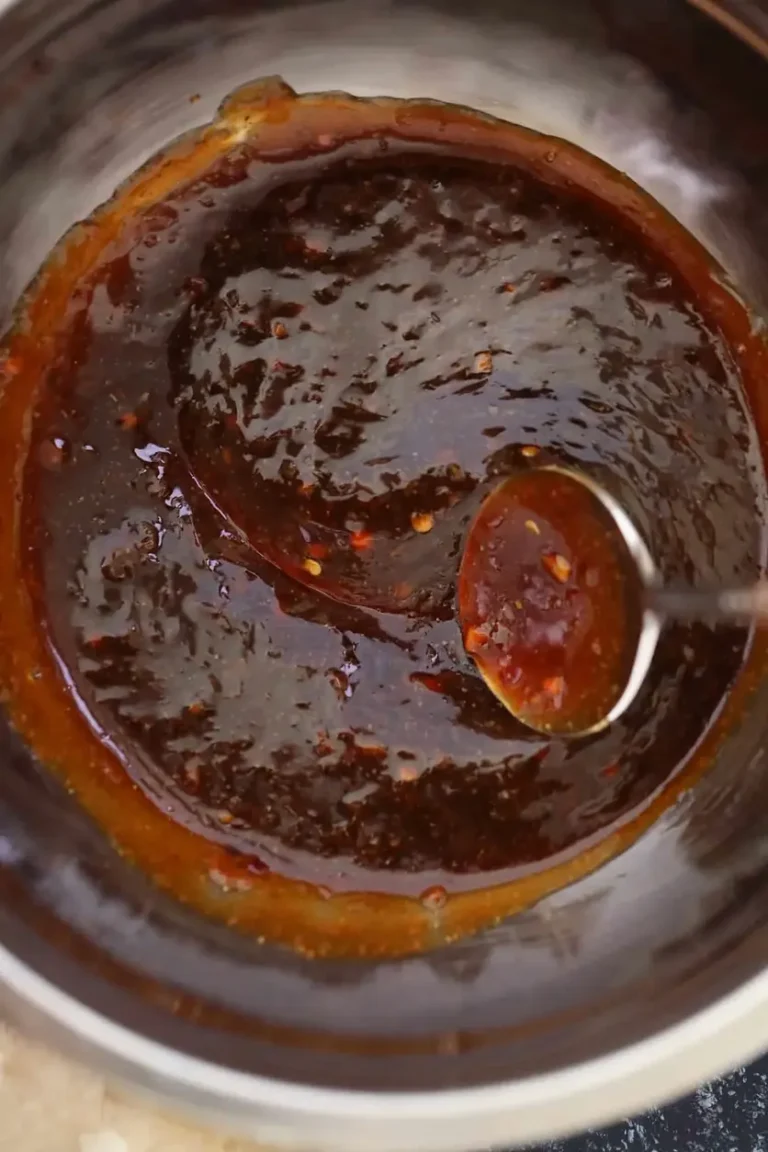
Give your cornstarch slurry a quick stir (it may have settled) and pour it into the simmering sauce while whisking continuously. The sauce will immediately begin to thicken. Continue whisking for 3–5 minutes, until the sauce coats the back of a spoon and leaves a clear trail when you run your finger through it. Remove the pan from the heat and let it cool for a couple of minutes — the sauce will thicken slightly more as it cools. Taste and adjust seasoning: add a pinch more sugar for sweetness, a splash of vinegar for tang, or extra chili sauce for heat.
💡 Pierre’s Pro Tip: For an extra-silky finish, strain the sauce through a fine-mesh sieve before serving. This removes any ginger fibers and gives you a restaurant-quality texture. It’s a step we always did in Paris for delicate sauces.
| Step | Action | Duration | Key Visual Cue |
|---|---|---|---|
| 1 | Prepare slurry | 1 minute | No lumps |
| 2 | Simmer base | 3–4 minutes | Gentle bubbles, aromatic |
| 3 | Thicken and finish | 3–5 minutes | Coats spoon, glossy |
Serving & Presentation
This Szechuan sauce is incredibly versatile. I love it drizzled over steamed rice with a simple stir-fry of bell peppers and broccoli — the sauce ties everything together with its bold, sweet-savory kick. For a quick weeknight dinner, toss it with cooked noodles, shredded chicken, and a handful of chopped scallions. It also makes a fantastic dipping sauce for dumplings, spring rolls, or even crispy tofu. In my NYC kitchen, I’ve even used it as a glaze for roasted salmon — just brush it on during the last five minutes of cooking for a caramelized, sticky finish.
When I serve this to guests, I like to transfer the sauce to a small ceramic bowl and garnish with a sprinkle of toasted sesame seeds and a few thin slices of fresh green onion. A drizzle of sesame oil on top adds a nutty aroma that wows everyone at the table. This presentation brings back memories of my mother’s dish in Morocco, where she’d always finish a sauce with a flourish of fresh herbs. For a party, set out bowls of this sauce alongside potstickers, edamame, and chicken skewers — it’s always the first thing to disappear.
| Pairing Type | Suggestions | Why It Works |
|---|---|---|
| Side Dish | Steamed jasmine rice, vegetable lo mein | Absorbs sauce well; balances heat |
| Sauce / Dip | Potstickers, spring rolls, fried tofu | Clings to crispy surfaces |
| Beverage | Jasmine iced tea, light lager | Cools palate; complements spices |
| Garnish | Sesame seeds, scallions, chili oil | Adds texture and visual appeal |
Make-Ahead, Storage & Reheating
As a busy New Yorker, I’m always meal-prepping, and this sauce is a dream for that. I often double the batch on Sunday and store it in the fridge for quick dinners throughout the week. The flavors actually deepen overnight, making it even tastier the next day. Here’s how to store it properly.
| Method | Container | Duration | Reheating Tip |
|---|---|---|---|
| Refrigerator | Airtight glass jar | Up to 1 week | Reheat gently in saucepan with splash of water |
| Freezer | Freezer-safe bag or container | Up to 3 months | Thaw overnight; reheat over low heat |
| Make-Ahead | Same as refrigerator | Up to 3 days in advance | Stir well before using; may thicken |
When reheating, I like to add a teaspoon of water or broth per cup of sauce to restore its original consistency. Heat it over low heat in a small saucepan, whisking occasionally, until it’s warm and smooth. If you’re using it cold
Print

Szechuan Sauce
Description
This Szechuan sauce is a flavorful sweet and savory recipe with just the right amount of spice. I make it in 15 minutes using soy sauce, fresh ginger, and chili garlic sauce. It works perfectly as a dip, marinade, or sauce for rice, noodles, and stir-fried meals.
Ingredients
- 1/4 cup low-sodium soy sauce
- 2 tablespoons red wine vinegar
- 1 tablespoon fresh ginger (minced)
- 2 tablespoons brown sugar
- 1 tablespoon Asian chili garlic sauce (or chili sauce)
- 1 tablespoon rice vinegar
- 1/2 teaspoon crushed red pepper flakes
- 1/2 teaspoon garlic powder
- 1/2 cup chicken broth (veggie broth for vegetarian)
- 1 tablespoon cornstarch
Instructions
- Combine broth and cornstarch in a small bowl; stir until dissolved
- In a saucepan over medium heat, add all ingredients except broth and cornstarch mix and bring to a light boil.
- Stir the cornstarch mixture until it thickens, about 3-5 minutes. Remove from heat and let it cool.



